
Create an FFmpeg Layer for AWS Lambda
How to run FFmpeg on AWS Lambda with a Lambda Layer for small serverless media jobs.
In one of my recent projects, I needed an AWS Lambda function that would receive a video, make a few small changes, re-encode it, and store the result on S3.
I wanted to keep the flow serverless, so I used FFmpeg through a Lambda Layer.
This post shows the simplest version of that setup:
- create a Lambda Layer with
ffmpegandffprobe - attach it to a Lambda function
- call both binaries from Node.js
This approach works well for small media jobs such as:
- converting audio
- extracting metadata
- trimming short clips
- generating thumbnails or previews
If you are building a full transcoding pipeline with large files or long-running jobs, Lambda is usually the wrong tool. In that case, look at services like MediaConvert, ECS/Fargate, or Batch instead.
AWS Lambda Layer (Quick Explanation)
An AWS Lambda Layer is a reusable package of files that gets mounted into a Lambda function at runtime.
It is useful when multiple functions need the same dependency and you do not want to bundle that dependency into every deployment.
A layer can contain things like:
- libraries
- shared code
- custom runtimes
- binaries such as
ffmpeg
When Lambda loads a layer, it mounts it under /opt.
So if your layer archive contains:
bin/ffmpegbin/ffprobe
they will be available inside the function as:
/opt/bin/ffmpeg/opt/bin/ffprobe
That is why Lambda Layers are one of the simplest ways to add command-line tools to serverless functions.
A Few Practical Limits
To keep expectations realistic, here are the limits that matter most:
- Lambda can run for at most 15 minutes
/tmpstorage is limited, so large files may not fit comfortably- CPU power depends on the memory you assign to the function
- the function package and layers still need to stay within Lambda size limits
For small jobs, this is fine. For heavy video processing, it becomes a bad fit quickly.
When Lambda Stops Being a Good Fit
Lambda is great when the media job is short, predictable, and small.
It stops being a good fit when files get large, processing time becomes unpredictable, or you need more control over CPU, memory, and disk. If you are building a serious transcoding pipeline, use a service designed for long-running media workloads instead of forcing Lambda to do the job.
Adding FFmpeg as a Lambda Layer
First, download a Linux build of FFmpeg.
I used a static build from:
https://johnvansickle.com/ffmpeg/
Two details matter here:
staticmeans the binary is self-contained and easier to run in Lambda- the binary architecture must match your Lambda function architecture
Also, pin the exact FFmpeg version you want and verify the checksum before publishing the layer.
For example:
- if your function uses
arm64, download anarm64build - if your function uses
x86_64, download anx86_64build
In this post, I am using arm64.
After downloading, extract the archive and place the binaries inside:
build/layer/bin
Writing the Layer Template
Here is a small SAM template for the layer:
AWSTemplateFormatVersion: 2010-09-09
Transform: AWS::Serverless-2016-10-31
Description: FFmpeg and FFprobe for AWS Lambda

Resources:
  LambdaLayer:
    Type: AWS::Serverless::LayerVersion
    Properties:
      LayerName: ffmpeg
      Description: FFmpeg and FFprobe binaries for Lambda
      ContentUri: build/layer
      CompatibleArchitectures:
        - arm64
      CompatibleRuntimes:
        - nodejs22.x
      LicenseInfo: GPL-3.0-only

Outputs:
  LayerVersion:
    Description: Layer ARN Reference
    Value: !Ref LambdaLayer
This keeps the template small and focused on what actually matters.
Packaging the Layer
Create an S3 bucket for deployment artifacts first, then package the template:
STACK_NAME="ffmpeg-lambda-layer"
DEPLOYMENT_BUCKET="<bucket_name>"

aws cloudformation package \
  --template-file template.yaml \
  --s3-bucket "$DEPLOYMENT_BUCKET" \
  --output-template-file output.yaml
Deploying the Layer
aws cloudformation deploy \
--template-file output.yaml \
--stack-name "$STACK_NAME"
aws cloudformation describe-stacks \
--stack-name "$STACK_NAME" \
--query 'Stacks[].Outputs' \
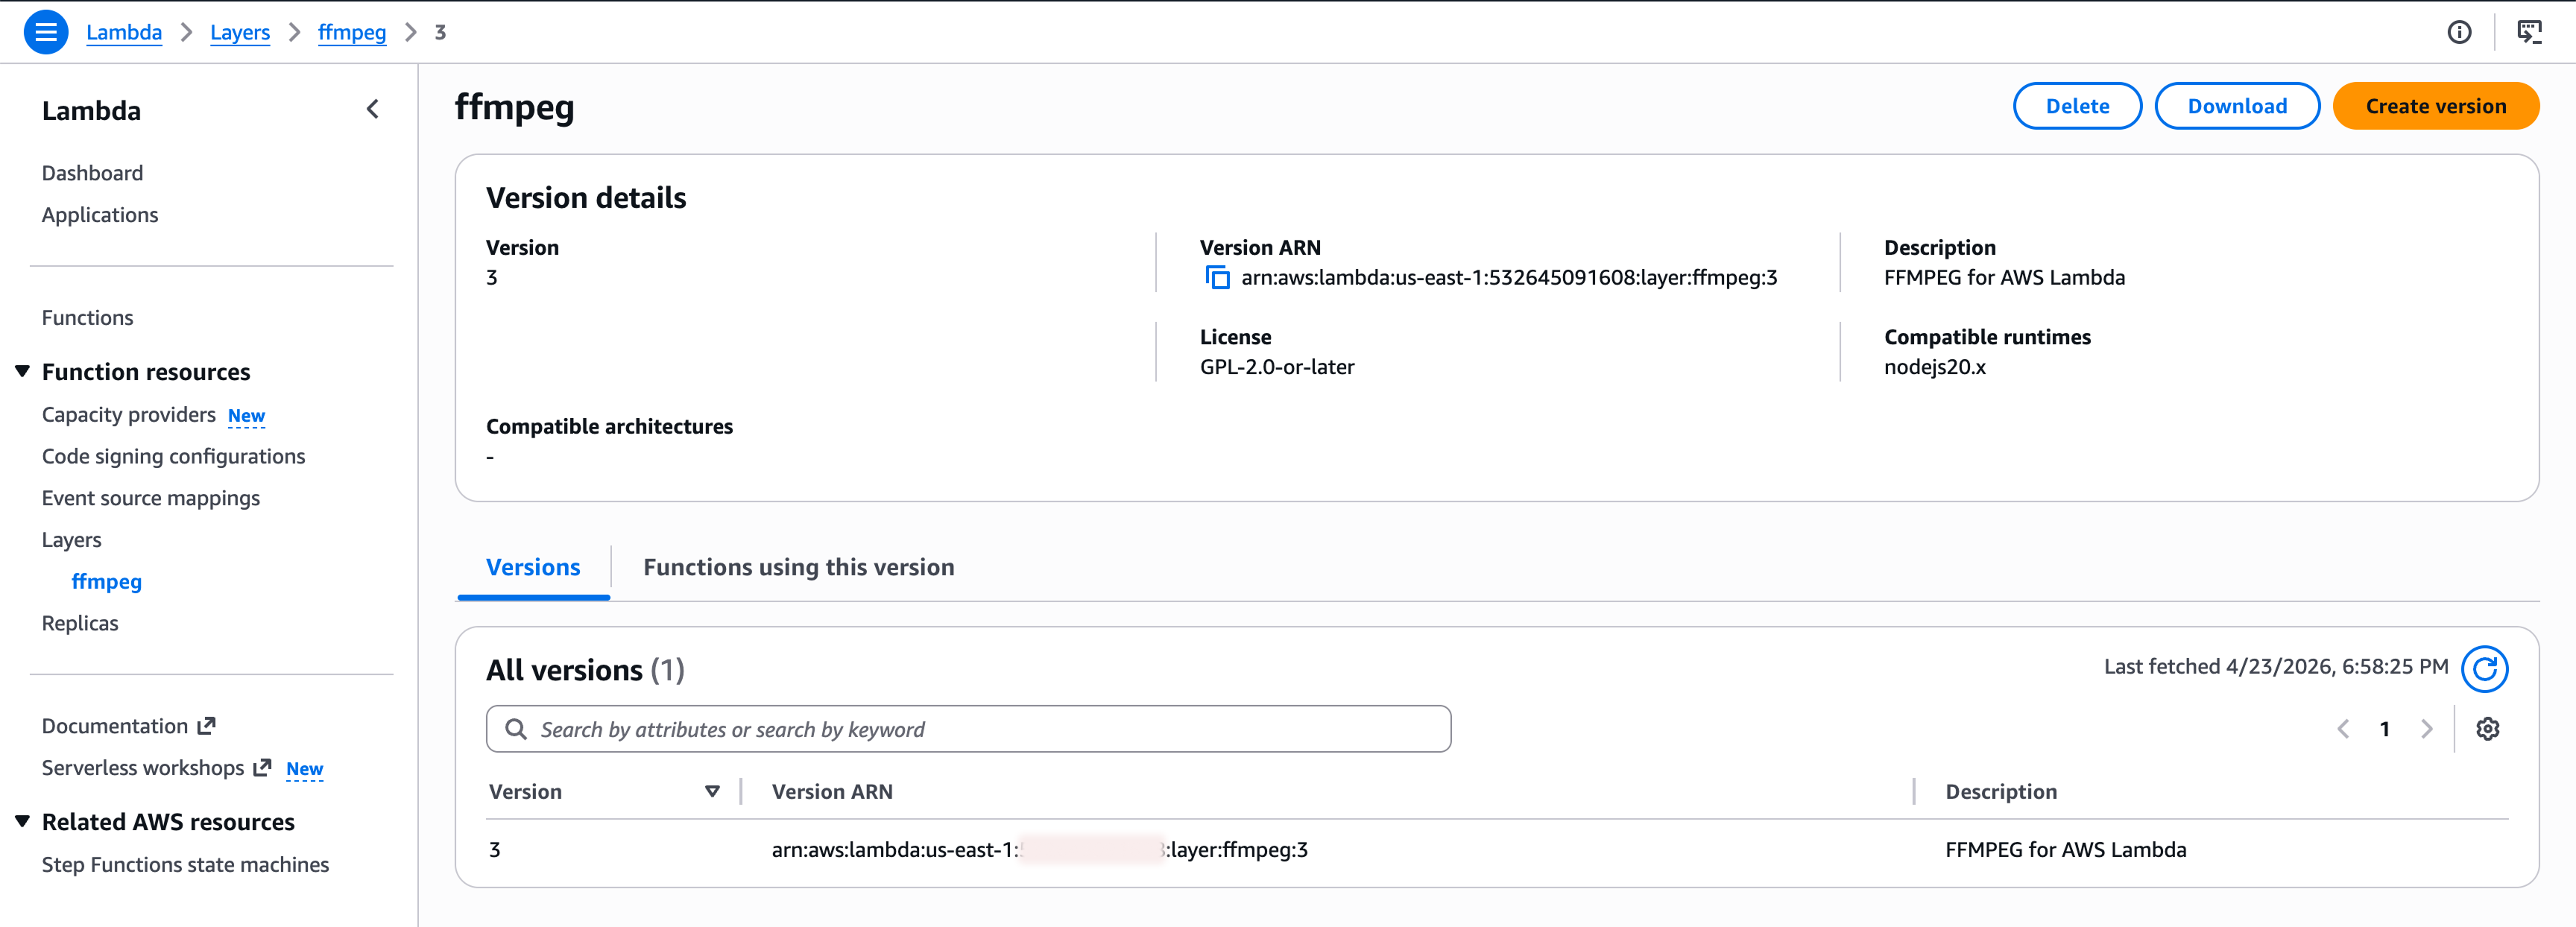
--output tableAfter deployment, you should see your layer in the AWS Lambda console under the Layers section.
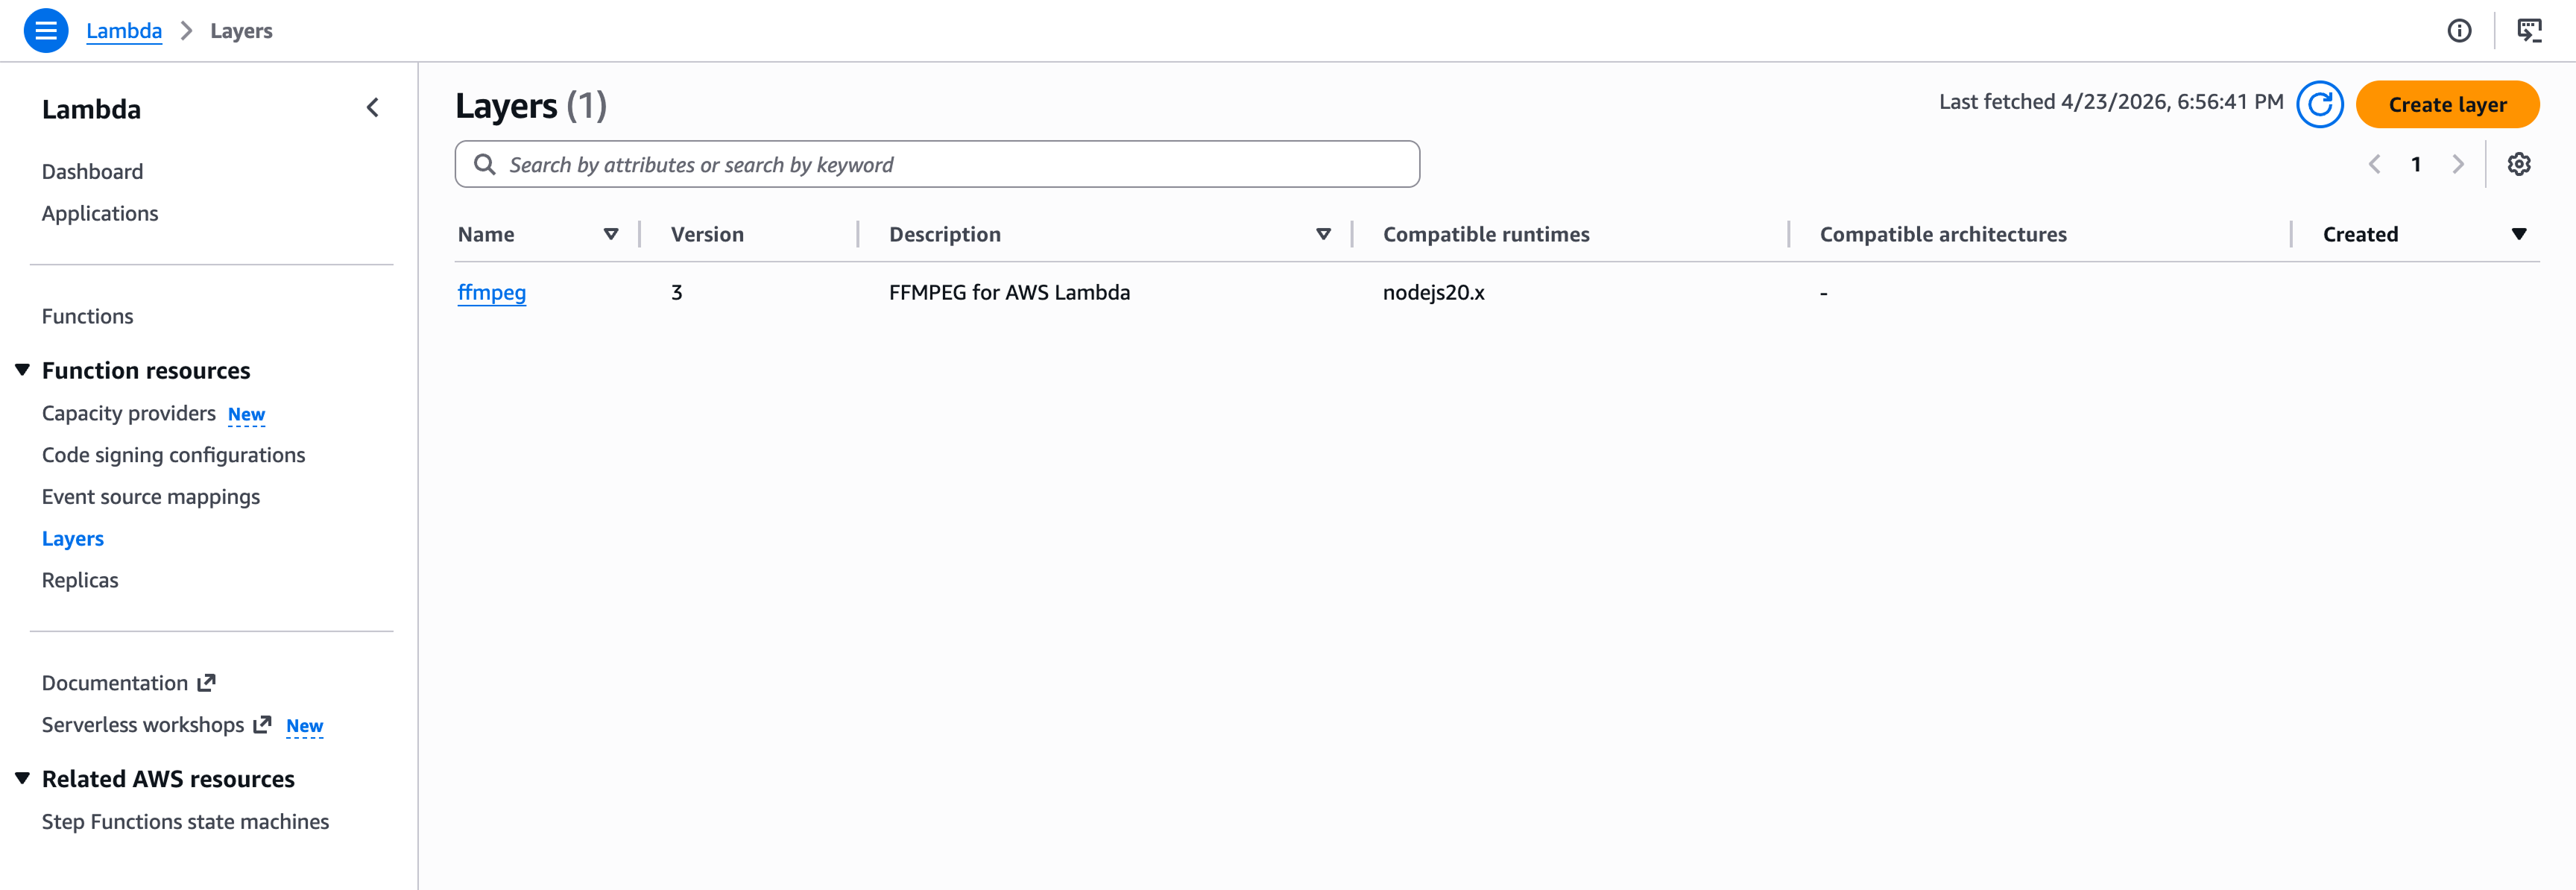
If you click the layer, you can copy the ARN. We will use that in the next step.
Attaching the Layer to a Function
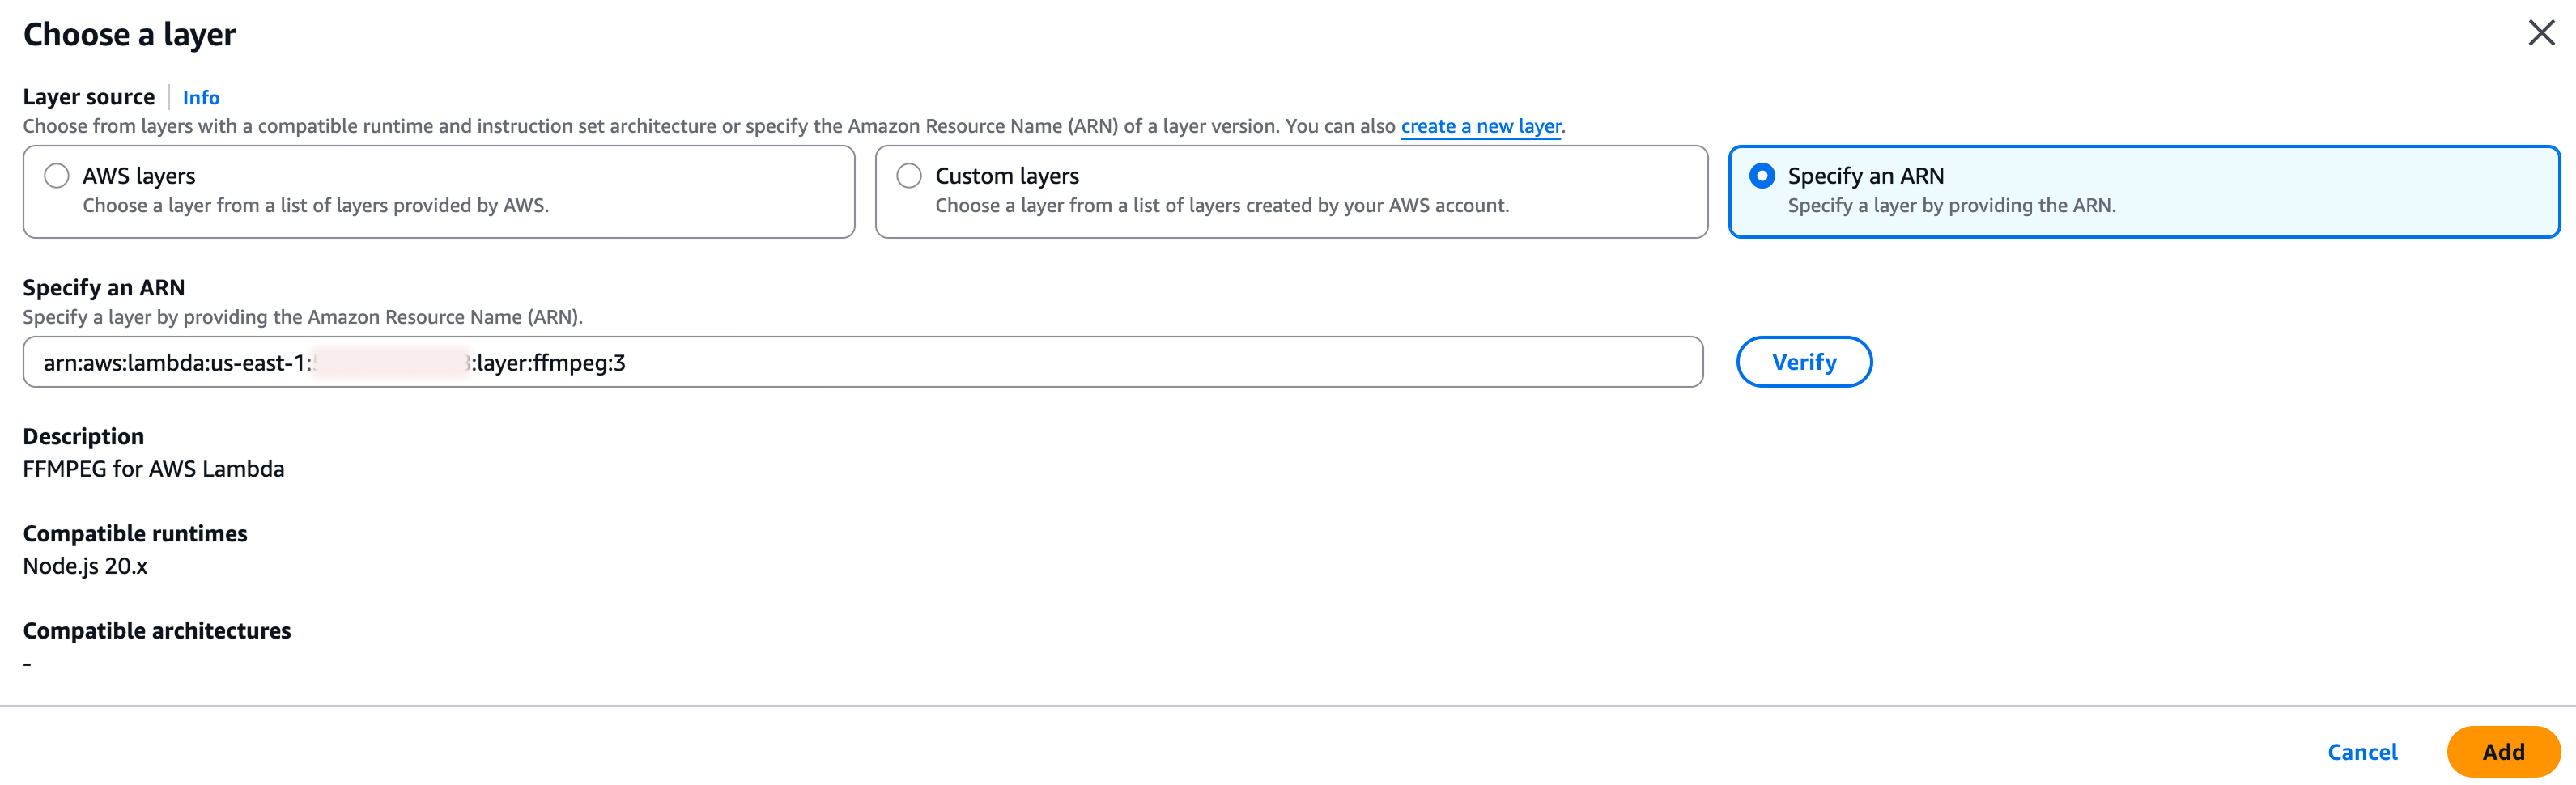
For a quick test, you can attach the layer in the AWS console:
- open your Lambda function
- scroll to the Layers section
- choose Add a layer
- choose Specify an ARN
- paste your layer ARN
- click Add
If you already manage your infrastructure with CDK or CloudFormation, keep this in code. Manual console changes are fine for a quick test, but they are not a good habit.
Using CDK
new NodejsFunction(this, 'lambda', {
  entry: 'lambda/index.ts',
  functionName: 'my-ffmpeg-app',
  handler: 'handler',
  runtime: lambda.Runtime.NODEJS_22_X,
  architecture: lambda.Architecture.ARM_64,
  memorySize: 2048,
  ephemeralStorageSize: cdk.Size.gibibytes(2),
  timeout: cdk.Duration.minutes(15),
  layers: [
    lambda.LayerVersion.fromLayerVersionArn(
      this,
      'ffmpeg-layer',
      'arn:aws:lambda:us-east-1:123456789012:layer:ffmpeg:3',
    ),
  ],
})
Using FFmpeg and FFprobe
Once the layer is attached, the binaries are available at:
export const FFMPEG_PATH = '/opt/bin/ffmpeg'
export const FFPROBE_PATH = '/opt/bin/ffprobe'
Example: Convert Audio to MP3
This example streams FFmpeg output directly to storage and still checks whether the process finished successfully.
import { spawn } from 'node:child_process'
import { PassThrough } from 'node:stream'

async function encodeAudio(filePath: string, duration: number) {
  const storage = new MyS3Storage()
  const output = new PassThrough()

  const child = spawn(
    FFMPEG_PATH,
    [
      '-i',
      filePath,
      '-t',
      duration.toString(),
      '-vn',
      '-ar',
      '12000',
      '-acodec',
      'libmp3lame',
      '-f',
      'mp3',
      '-',
    ],
    { stdio: ['ignore', 'pipe', 'pipe'] },
  )

  let stderr = ''
  child.stderr.setEncoding('utf8')
  child.stderr.on('data', chunk => {
    stderr += chunk
  })

  const uploadPromise = storage.upload('filename.mp3', output)
  child.stdout.pipe(output)

  const processPromise = new Promise<void>((resolve, reject) => {
    child.once('error', reject)
    child.once('close', code => {
      if (code === 0) {
        resolve()
        return
      }

      reject(new Error(`ffmpeg failed: ${stderr}`))
    })
  })

  await Promise.all([uploadPromise, processPromise])
}
Example: Extract Media Metadata
For metadata, ffprobe can return JSON directly. That is much cleaner than parsing text output by hand.
import { spawn } from 'node:child_process'

async function getMediaMetadata(filePath: string) {
  const child = spawn(
    FFPROBE_PATH,
    [
      '-v',
      'quiet',
      '-print_format',
      'json',
      '-show_format',
      '-show_streams',
      filePath,
    ],
    { stdio: ['ignore', 'pipe', 'pipe'] },
  )

  let stdout = ''
  let stderr = ''

  child.stdout.setEncoding('utf8')
  child.stderr.setEncoding('utf8')

  child.stdout.on('data', chunk => {
    stdout += chunk
  })

  child.stderr.on('data', chunk => {
    stderr += chunk
  })

  await new Promise<void>((resolve, reject) => {
    child.once('error', reject)
    child.once('close', code => {
      if (code === 0) {
        resolve()
        return
      }

      reject(new Error(`ffprobe failed: ${stderr}`))
    })
  })

  return JSON.parse(stdout)
}
Quick Setup (Makefile)
If you do not want to do each step manually, here is a small Makefile:
STACK_NAME ?= ffmpeg-lambda-layer

clean:
	rm -rf build output.yaml

build/layer/bin/ffmpeg:
	mkdir -p build/layer/bin
	rm -rf build/ffmpeg*
	cd build && curl -L -O https://johnvansickle.com/ffmpeg/releases/ffmpeg-release-arm64-static.tar.xz
	cd build && tar xf ffmpeg-release-arm64-static.tar.xz
	mv build/ffmpeg-*-arm64-static/ffmpeg build/layer/bin/
	mv build/ffmpeg-*-arm64-static/ffprobe build/layer/bin/

output.yaml: template.yaml build/layer/bin/ffmpeg
	aws cloudformation package --template-file $< --s3-bucket $(DEPLOYMENT_BUCKET) --output-template-file $@

deploy: output.yaml
	aws cloudformation deploy --template-file $< --stack-name $(STACK_NAME)
	aws cloudformation describe-stacks --stack-name $(STACK_NAME) --query 'Stacks[].Outputs' --output table
Then run:
make clean
make build/layer/bin/ffmpeg
DEPLOYMENT_BUCKET="<bucket_name>" make output.yaml
make deploy
One final note: this article keeps the setup intentionally simple. That is useful for learning and small internal tools. For production, treat the FFmpeg binary like any other external dependency and manage its version carefully.
Rarely, but worth it
A short note whenever I publish something new.
Plus one newsletter-only post each month.